Evidence File
The Evidence File houses documents that are referenced and linked to in the Assurance Argument. All contributors may view the Evidence File, but only coordinators and editors may add, edit and remove PDF files and URL sources.
Types of Evidence
HLC Documents
Approximately six months before the institution’s lock date, HLC will upload historical documents to the Evidence File that may be used in the Assurance Argument. This material will be saved in a folder called “HLC Documents.” Documents in this folder cannot be deleted or modified. They are also not included in the zip file when users export a copy of the institution’s PDF files.
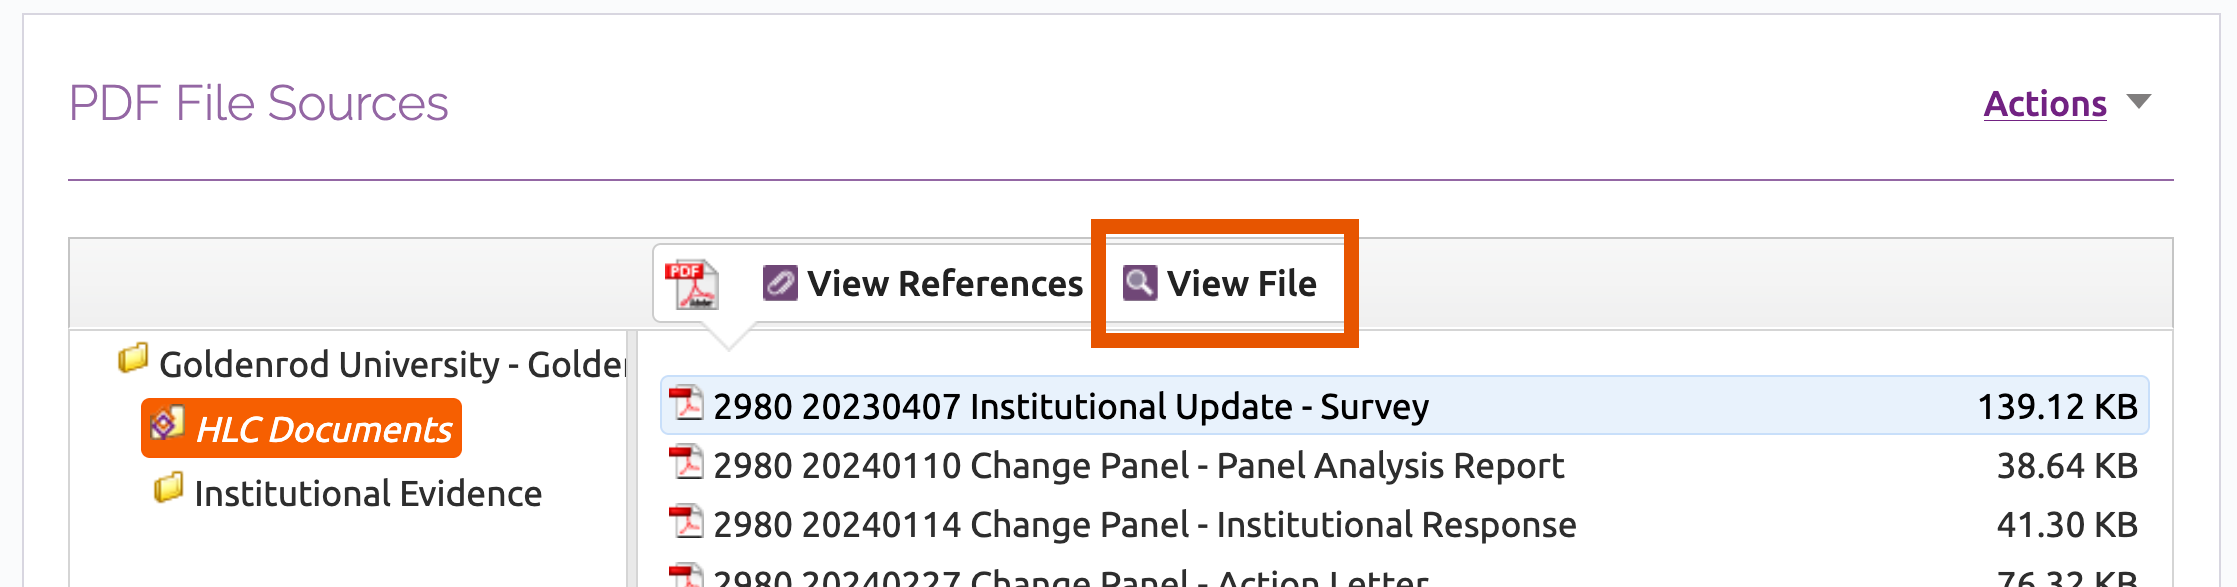
To view documents in the HLC Documents folder:
- Click on the HLC Documents folder.
- Click on the file name within the folder.
- Select “View File” and the file will open in a separate window.
URL Sources
There are five specific pieces of evidence that can be submitted as webpage URLs:
- Course catalog
- Faculty handbook
- Staff handbook
- Student handbook
- Class schedules
PDF Files
This is the main category of evidence within the Assurance Filing. Other than the URL sources listed above, all evidence must be uploaded as PDF files.
Word, Excel, or other types of documents that the institution wishes to provide as evidence must be converted into PDF files.
Webpages that are not included in the allowable URL sources will need to be captured as PDF files. This is to ensure that the information is available to the review team in the event that the website is changed, and it allows for the evidence to be archived. (Most web browsers allow users to save webpages as PDF documents.)
Manage URL Sources
To add a URL:
- After opening the Assurance Filing, click “Evidence Files” in the side menu.

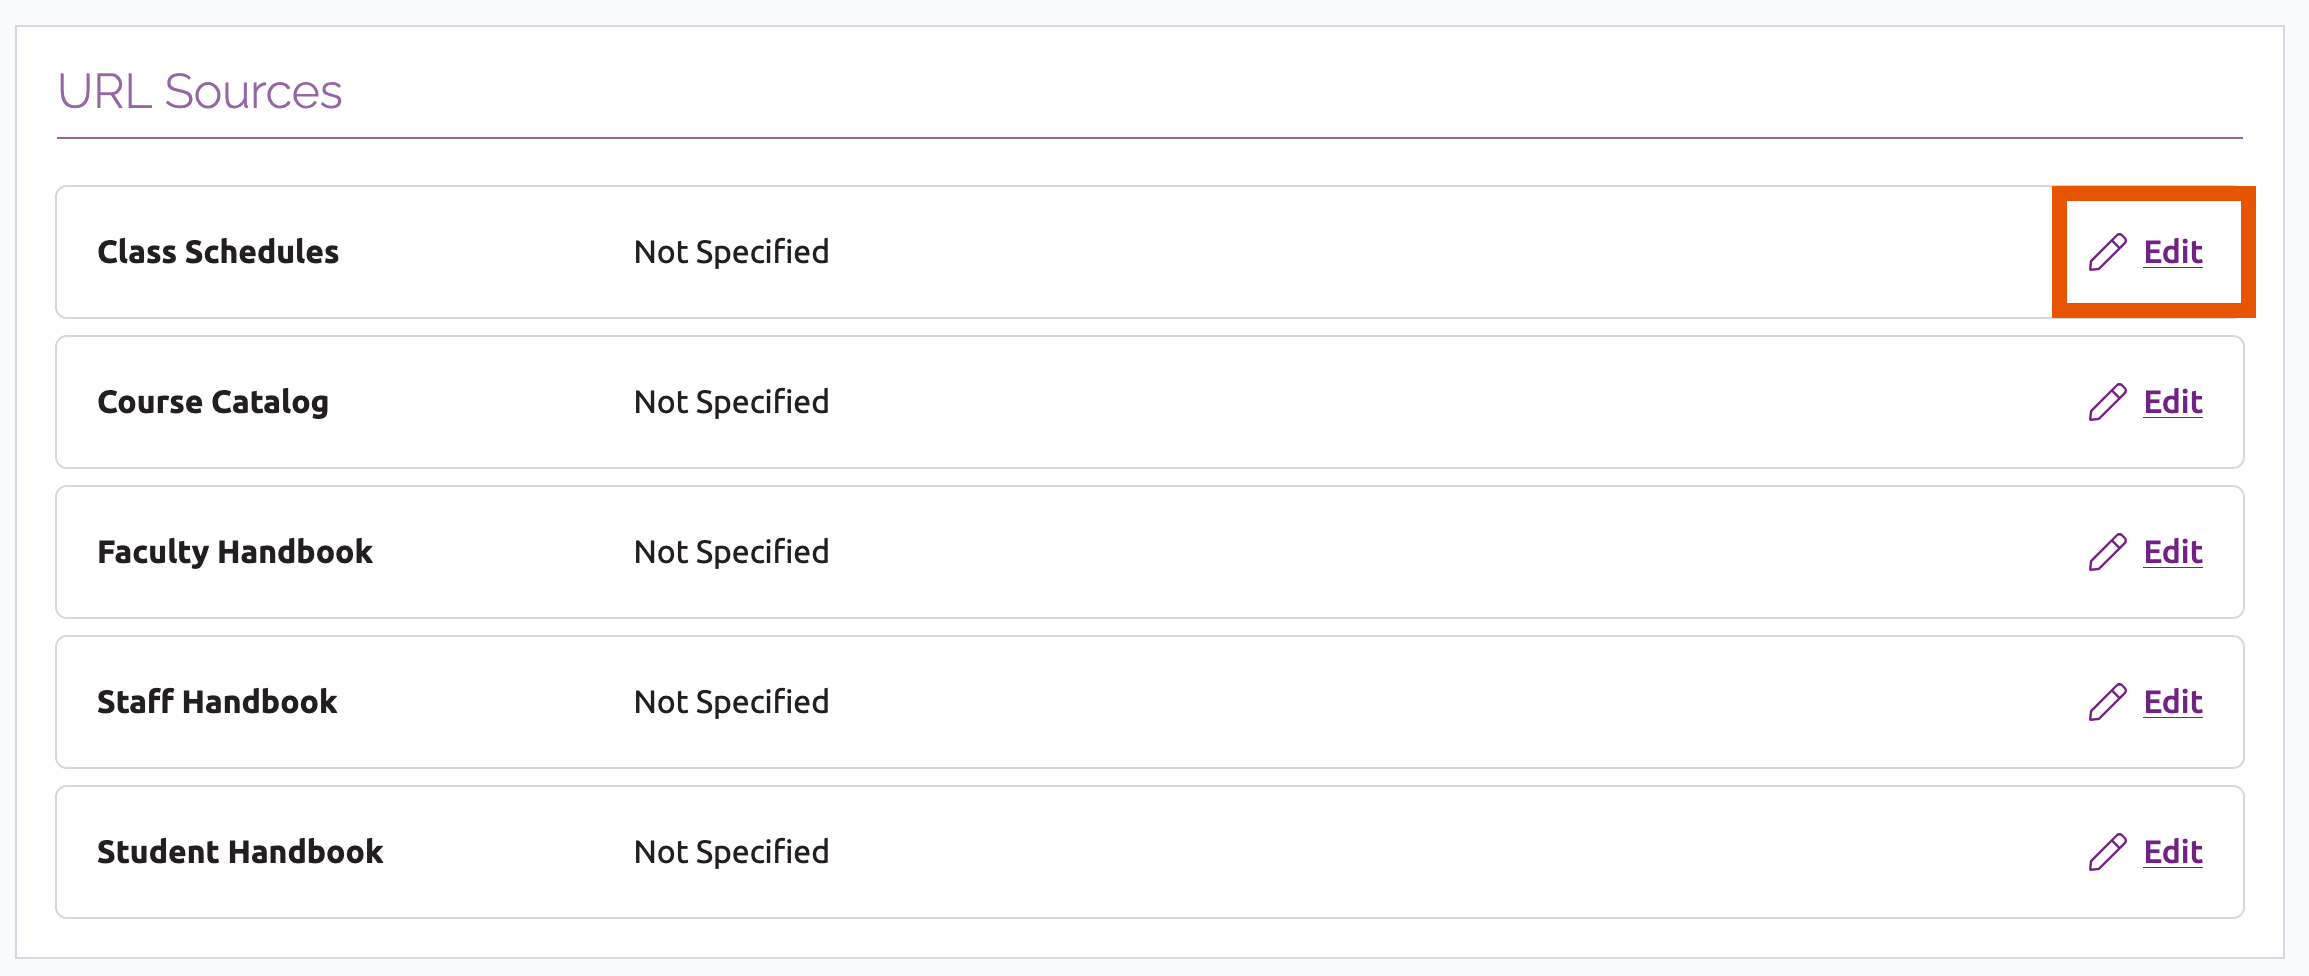
- On the Evidence File page, scroll down to the URL Sources section.
- Click the Edit link next to the URL you would like to add.
- Type or paste in the relevant URL. Be sure to include the full URL, starting with “https://”.
- Click the Save button.
- To ensure the correct link was added, clink the link in the list of sources. This will open the webpage in a new browser tab.
The URL may be changed at any time by clicking the Edit link.
Note: Reviewers will not be able to view URL sources unless they are linked in the Assurance Argument narrative.
Manage PDF Files
Folders
There is no limit on the number of folders and subfolders that coordinators and editors may create to organize PDF files.
Add a Folder
- After opening the Assurance Filing, click “Evidence Files” in the side menu. On the Evidence File page, scroll down to the PDF File Sources section.
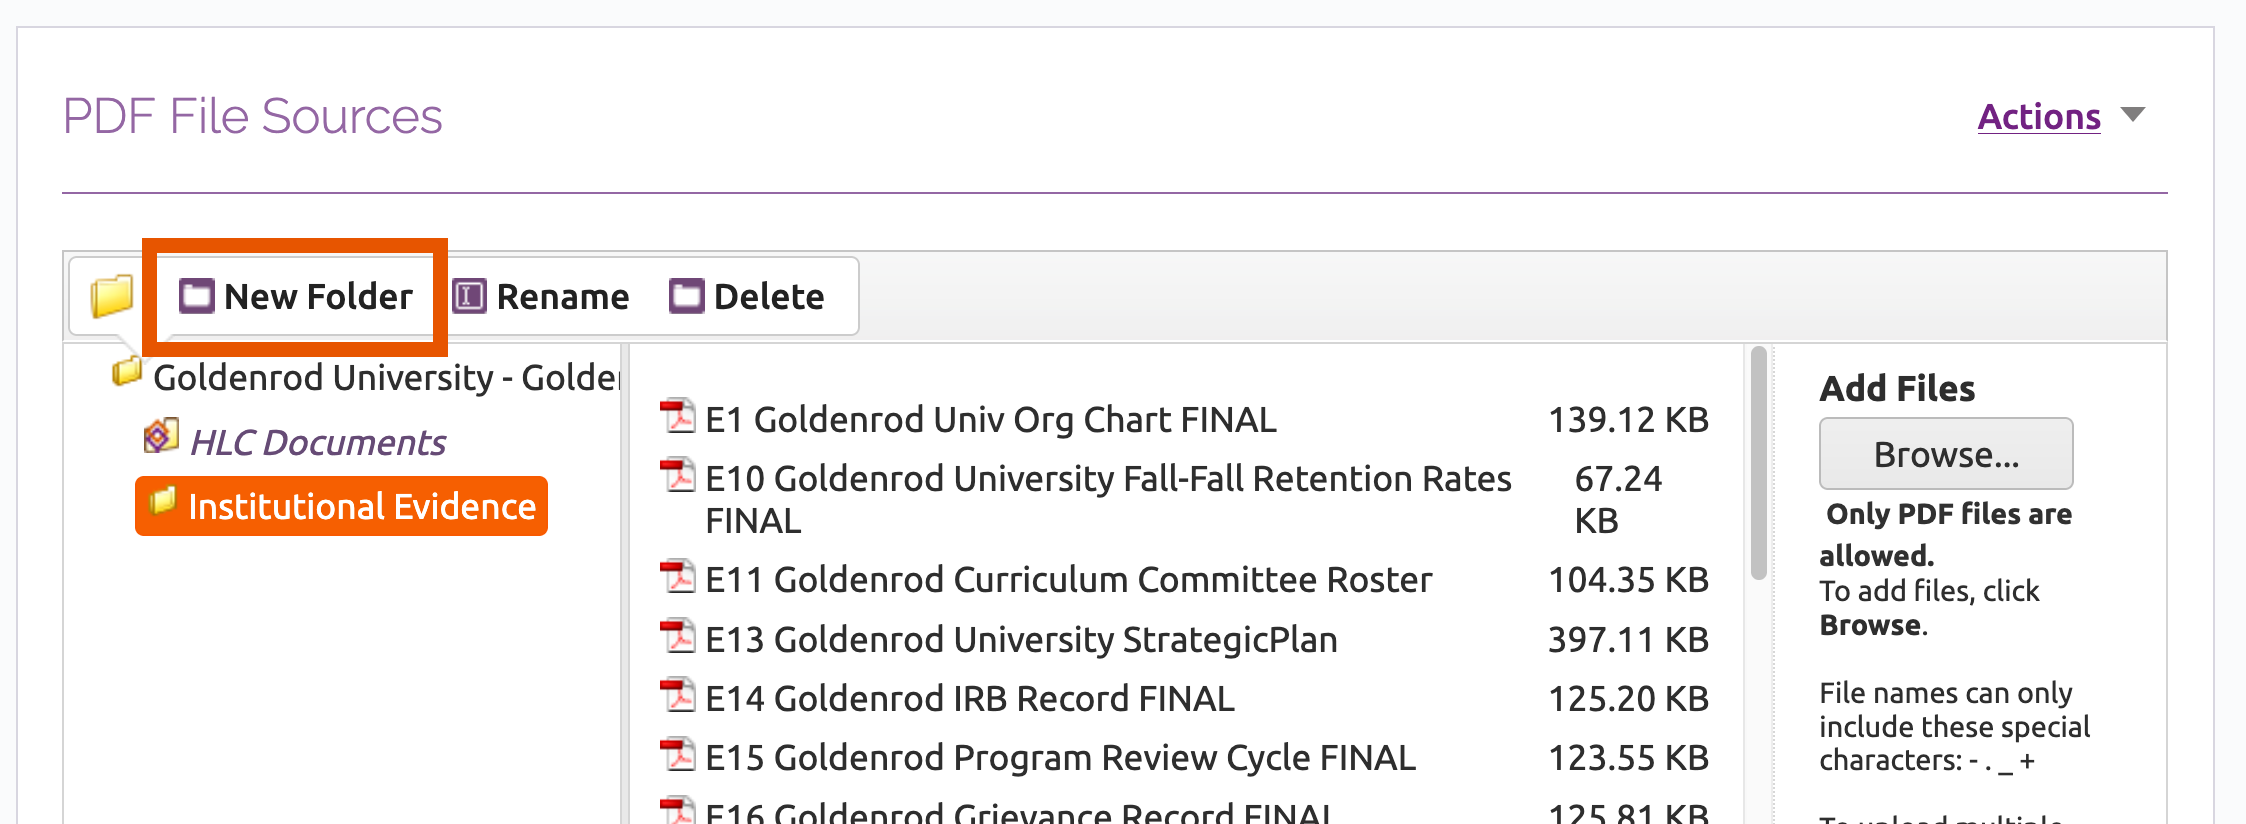
- In the file manager, click the name of the folder under which you would like the new folder to appear. A folder cannot be moved after it is created, so be sure to select the correct location in the file manager.
- Click on “New Folder” and type in a title for the folder.
- Click the Save button. Folders will appear in the order they are created.
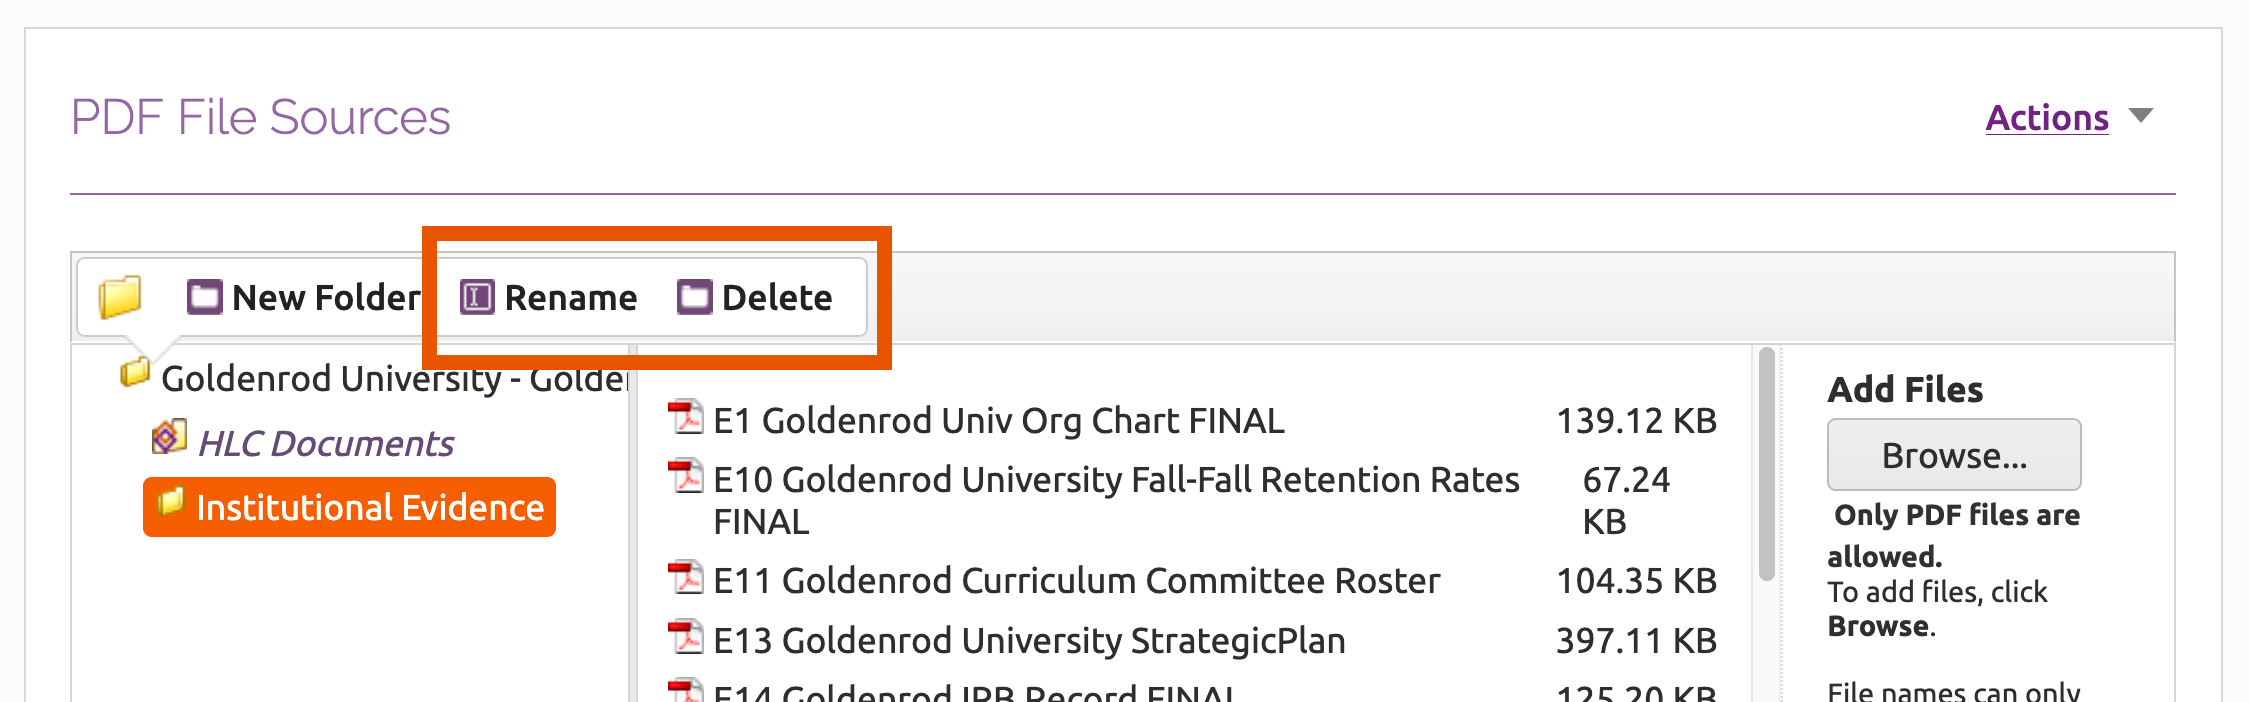
Rename or Delete a Folder
Click the name of the folder and then click the Rename or Delete button in the toolbar that opens above the folder.
Deleting folders: The system will not delete a folder that contains files. Users must delete or move all files in a folder before deleting it.
PDF Files
Number of Files, File Sizes and File Names
- There is no limit on the number of files that can be uploaded into the Evidence File.
- The maximum individual file size is 50MB. Files greater than 50MB must be split into smaller files and uploaded separately.
- Note: HLC recommends keeping file sizes to 10MB or fewer, if possible, to minimize download times for the peer review team. If a web browser stalls while uploading a PDF, it is likely due to a large file size or slow internet connection.
- File names can only include certain special characters: hyphen (-), period (.), underscore (_) or plus sign (+). Users will not be able to upload files that have other special characters in the file name, such as commas, question marks or slashes.
Upload a File
- Navigate to the Evidence File section of the Assurance Filing and scroll down to the PDF File Sources section.
- Click on the folder name where the document(s) should be added.
- Click the Browse button located in the right sidebar of the file manager.
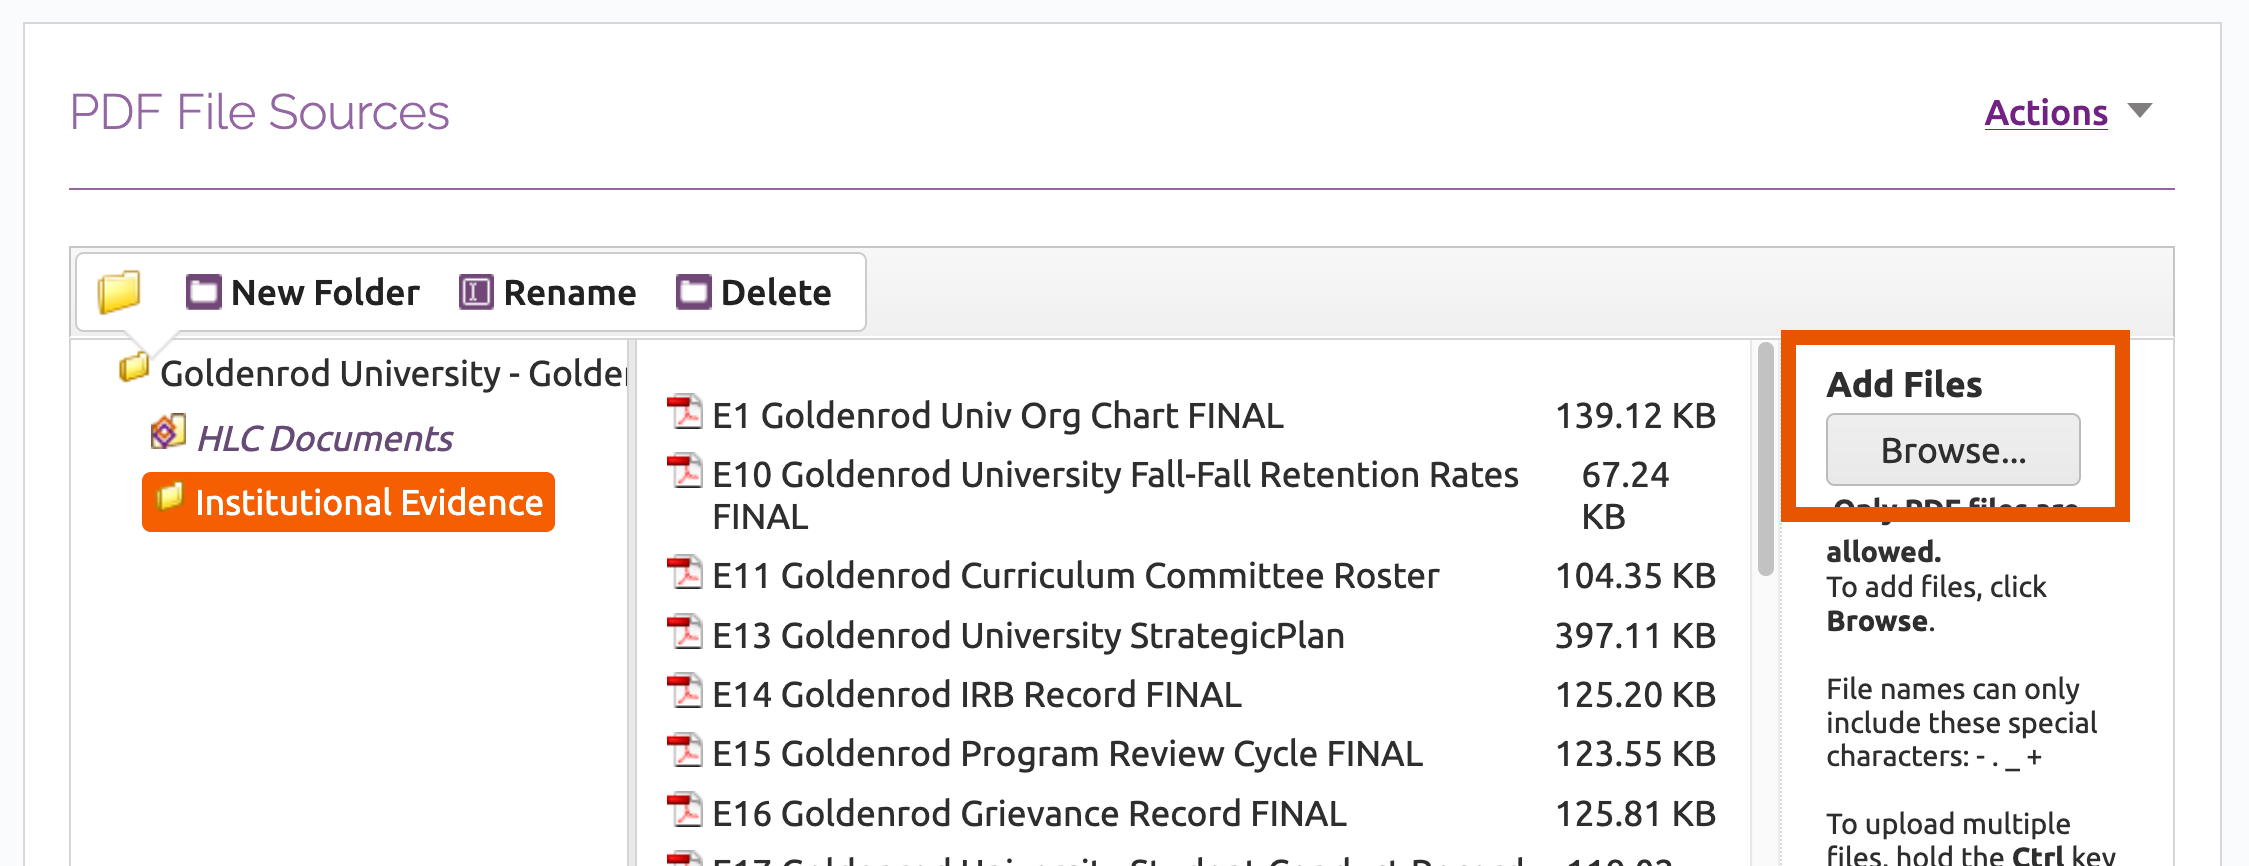
- Locate the desired file, select it and click “Open.” Multiple files may be added at once by holding down the Control key (Windows) or Command key (Mac) and selecting the desired files before clicking “Open.”
Once a file is added, it will appear in the selected folder. Continue uploading files as necessary; they will appear in alphabetical order within each folder.
Once the evidence has been uploaded, view each file to ensure that the correct evidence has loaded properly. Click the file name and select “View File” from the toolbar that opens.
Move a File
A file may be moved to a different folder by dragging and dropping the file into the desired location.
View and Modify Files
Click on a file to open a toolbar with multiple options for viewing and modifying information about the document.

- View References
See where the file is referenced in the Assurance Argument. See View References for an Individual PDF File below for more details about this feature. - View File
Open the file in a separate browser window. - Replace a File
Upload a new version of the file. Any references to the file in the Assurance Argument will be linked to the new version. - Rename a File
Change the file name. - Delete a File
Permanently delete the file from the Evidence File.
Check References to PDF Files
All documents that an institution uploads to its Evidence File must be linked in the text of the Assurance Argument (see instructions for linking to Evidence File sources in the Assurance Argument).
This is important for two reasons:
- Any files that aren’t linked in the Assurance Argument will be deleted from the system when the institution locks its Assurance Filing.
- Reviewers can only access files that are linked in the Assurance Argument.
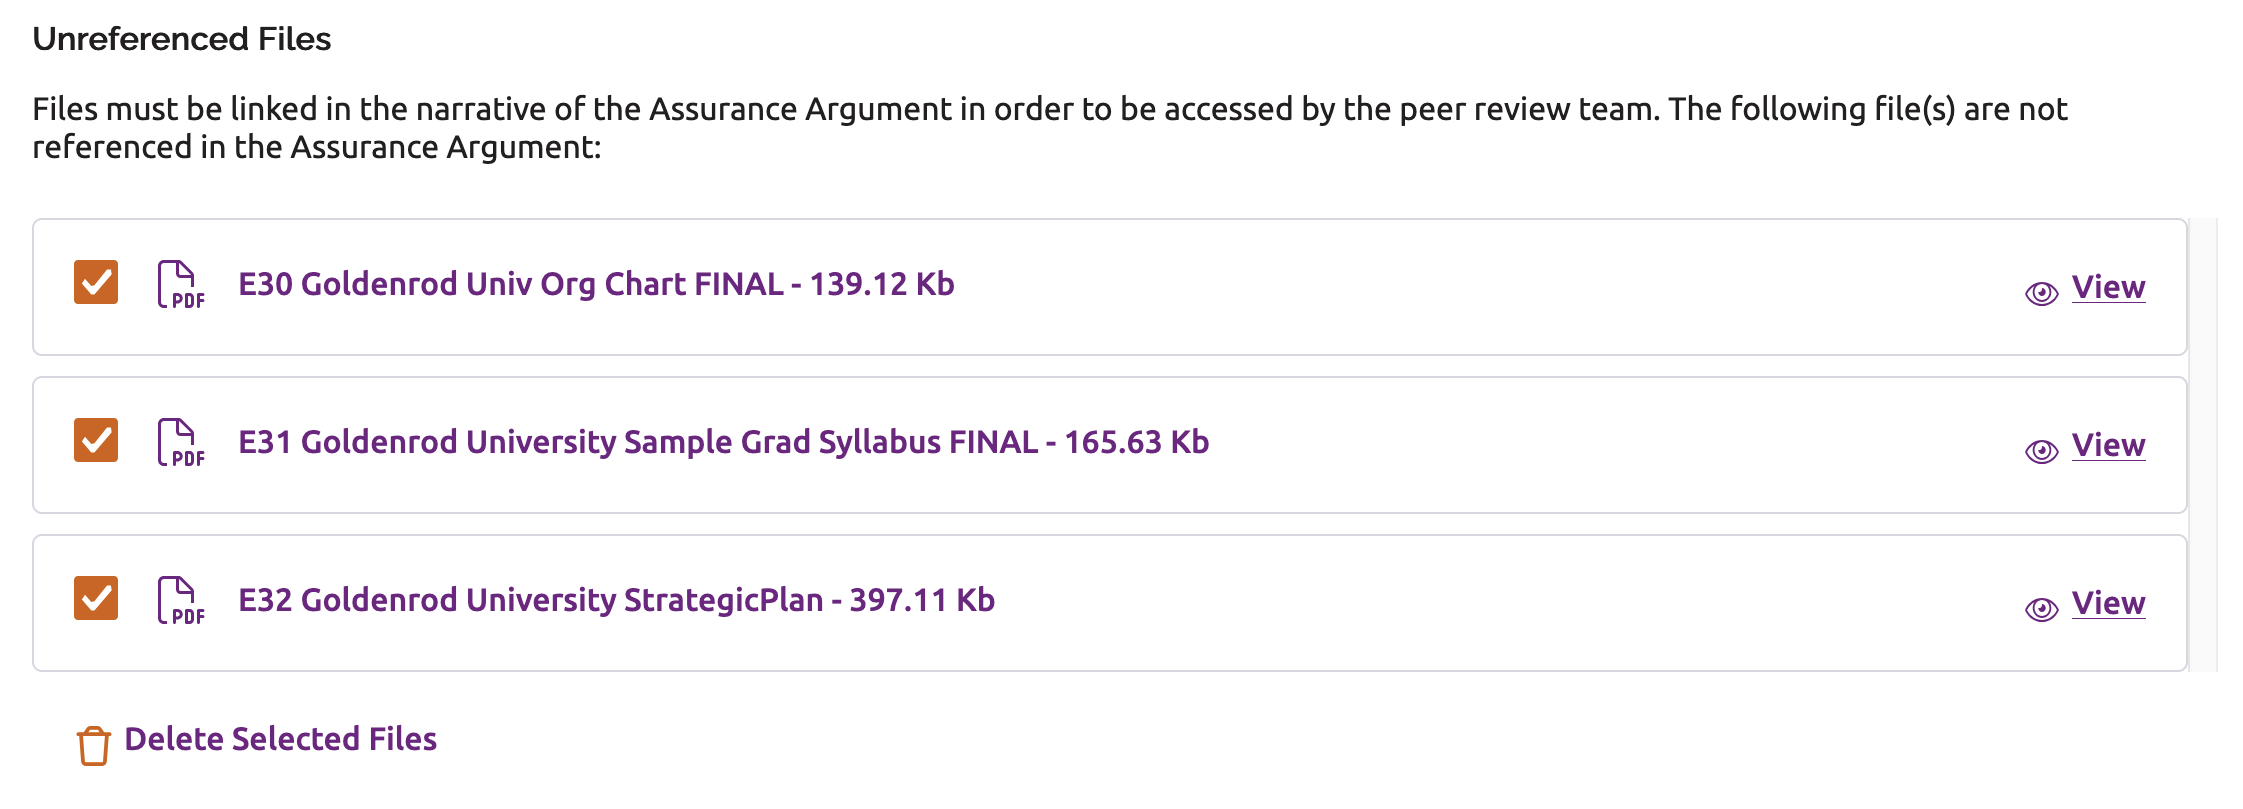
View Unreferenced Files
If one or more files have not been added as sources to a section of the Assurance Argument, they will be listed in an Unreferenced Files section below the file manager. Files will be removed from this list when they are added as sources in the Assurance Argument.
Note: This section will not be displayed if all files are referenced in the Assurance Argument.
To permanently delete any unreferenced files from the Evidence File:
- Click “Select All” or select individual files.
- Click “Delete Selected Files.”
View References for an Individual PDF File
To view where an individual PDF file is referenced in the Assurance Argument:
- Click the file name in the file manager.
- Click “View References” in the toolbar that appears above the file. This will open a list of the Core Component section(s) where the file is referenced. If the file has not been referenced, it will show that no references currently exist.
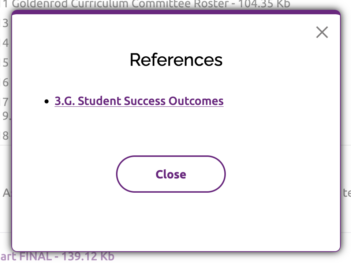
- Click the name of a Core Component section to go to that section of the Assurance Argument, or click the Close button to return to the file manager.
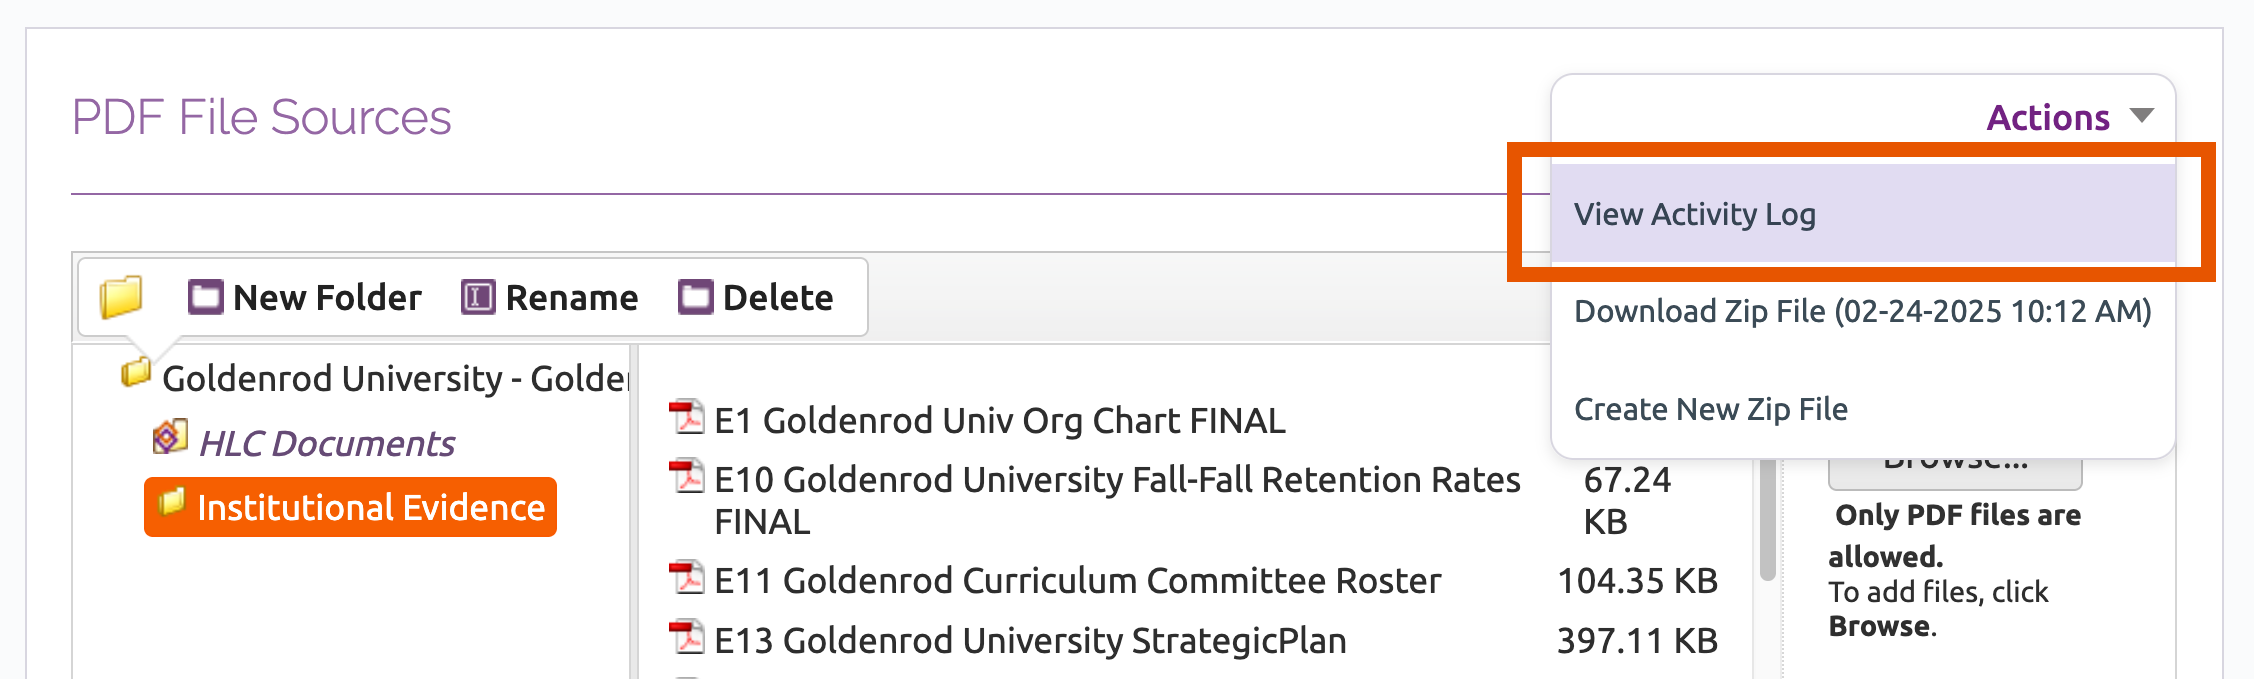
Track Changes to the Evidence File
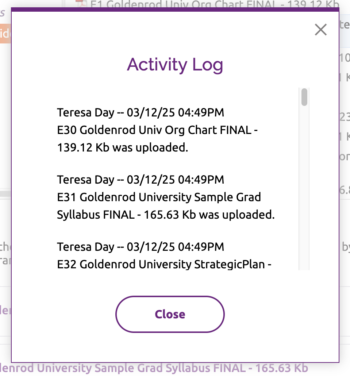
Canopy automatically keeps a log of all activity within the Evidence File. To view it:
- Click the Actions link above the file manager
- Select “View Activity Log.”
This will display a list of changes made to the Evidence File, with the name of the user who performed the activity, the date and time of the activity, and the action taken.
Export a Copy of the Institution’s PDF Files
Users may export a copy of the PDF files that the institution uploads to the Evidence File. The export will not include files in the HLC Documents folder.
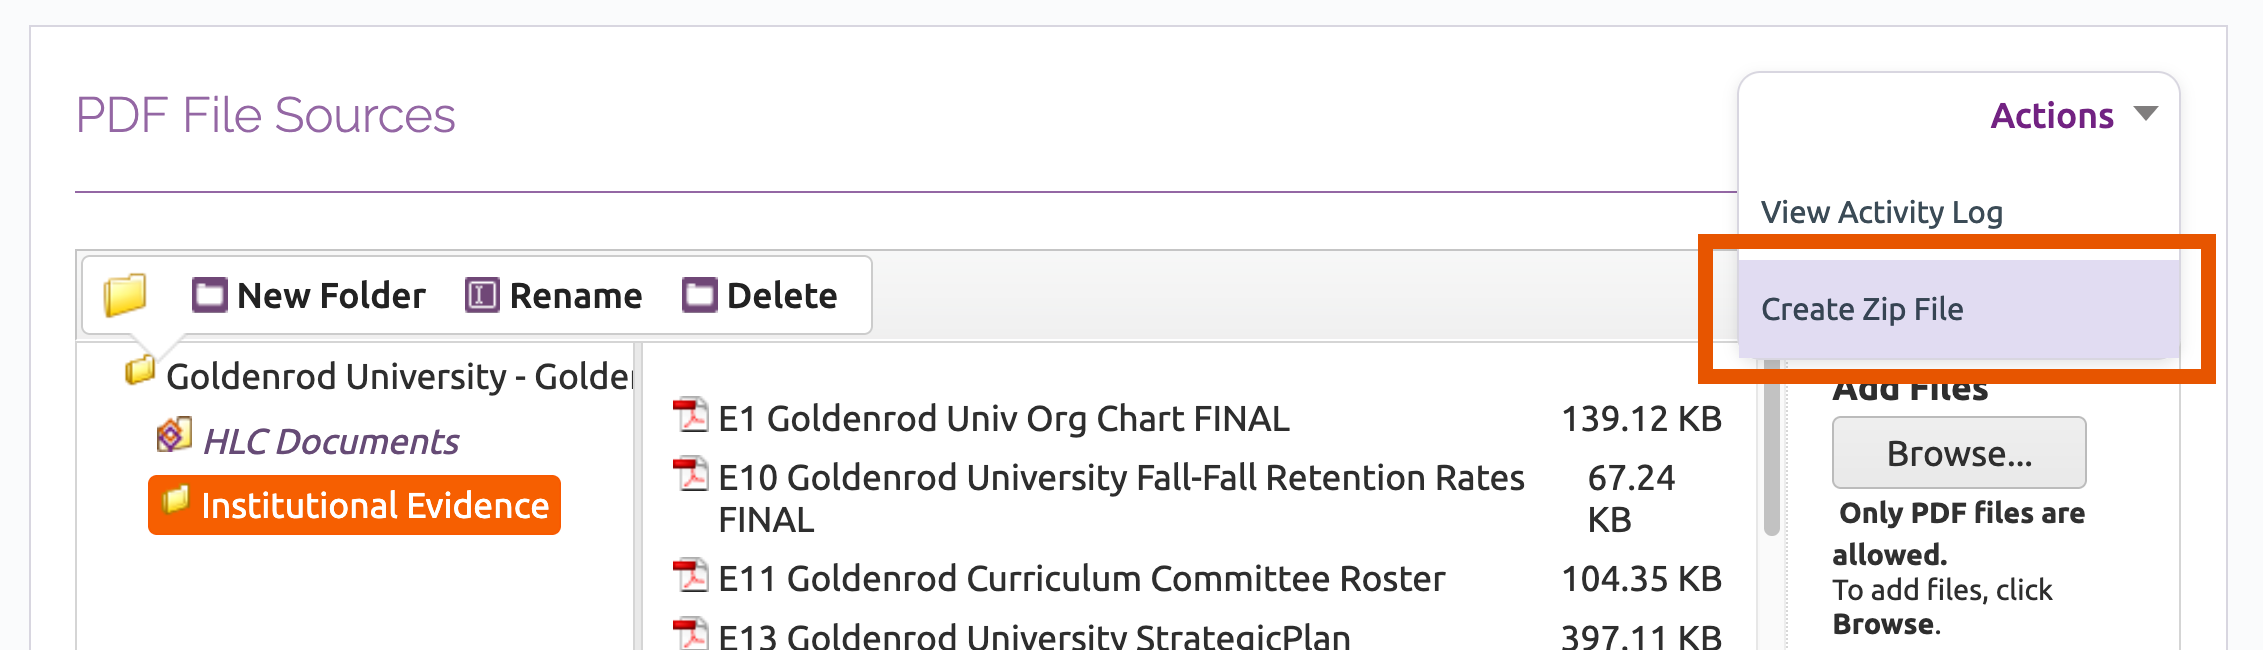
To export the institution’s PDF files:
- Click the Actions link above the file manager.
- Select “Create Zip File.”
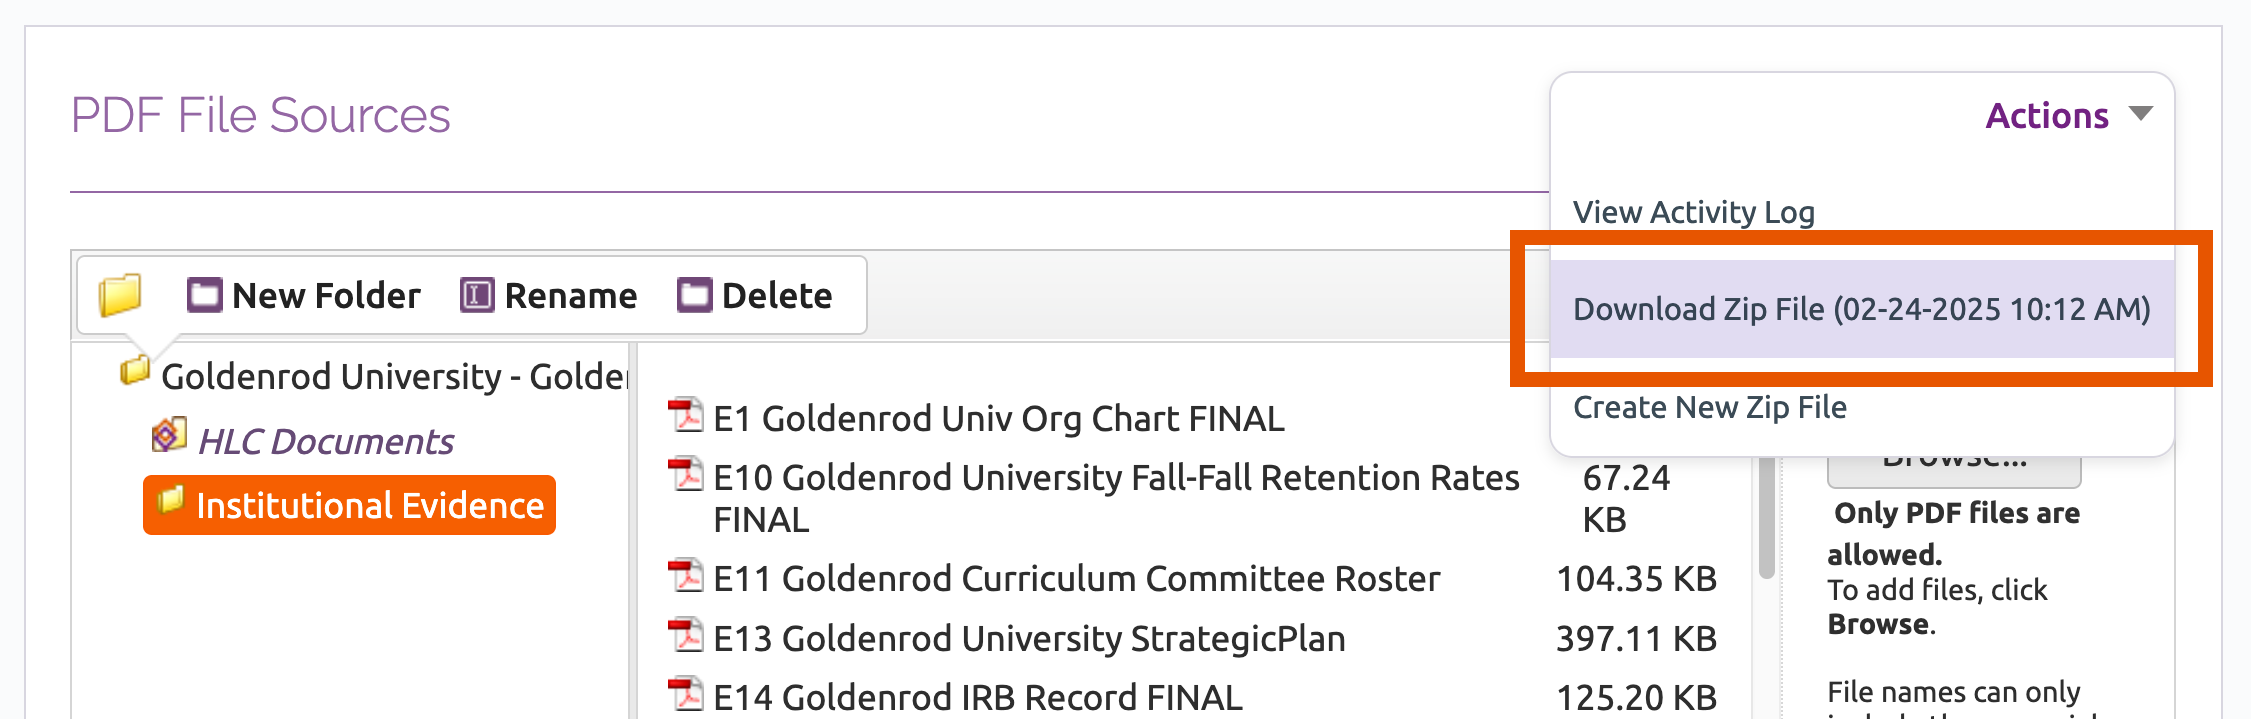
- When the file has been generated, users may access it in two ways:
- The user who requested the zip file will receive an email when the file is ready to download. Click the link in the email message to download the zip file.
- The zip file can also be downloaded from the Evidence File. Click the Actions link above the file manager, and then select “Download Zip File.”
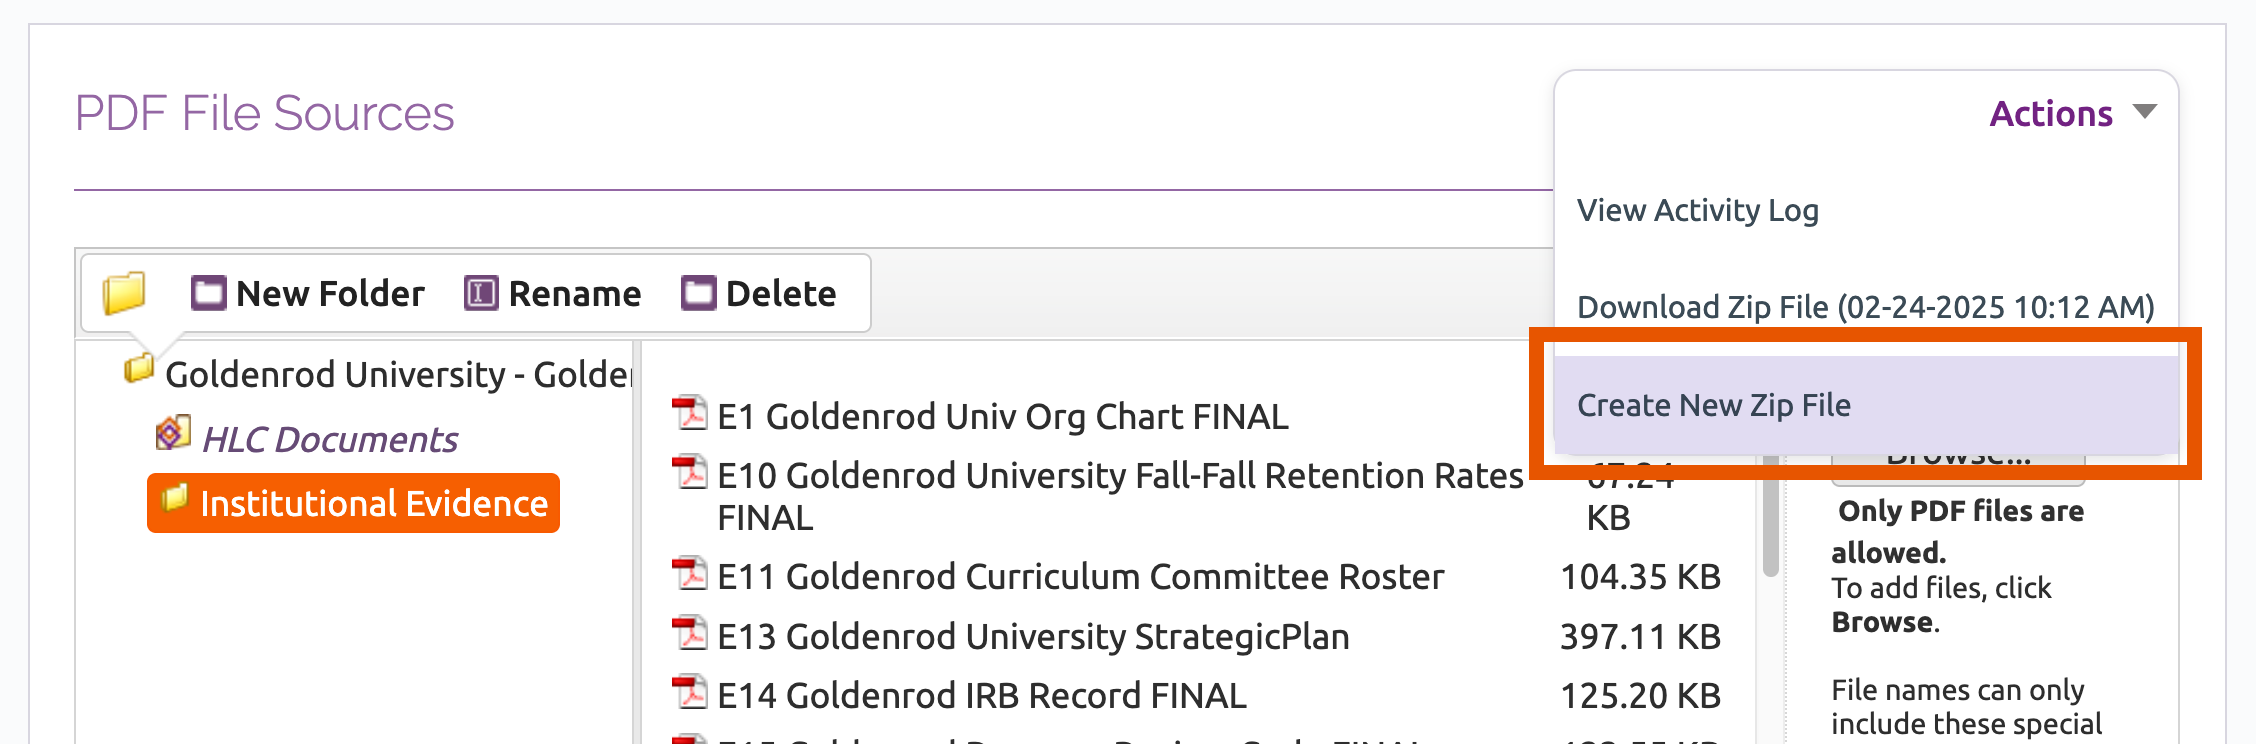
Create New Zip File to Capture Changes Made to the Evidence File
If any user makes changes to the Evidence File documents, the zip file will need to be recreated in order for those changes to be reflected in the zip file contents. To do so, click the Actions link and select “Create New Zip File.”
Tips for Managing the Evidence File
- Consider having just one person responsible for creating and uploading documents in order to keep the Evidence File organized and avoid duplication or accidental deletion of files.
- Before uploading documents into the Evidence File, develop a file-naming convention. This will make it easier to find documents when linking files within the Assurance Argument.
- If possible, consult with library staff, especially an archivist, to design a folder system that works for the institution. There are numerous ways to organize documents in the Evidence File:
- By Criterion.
- By the organization of the institution. For example, the institution may create a folder for each major division of campus (e.g. Academic Affairs, Student Affairs, etc.) with subfolders to represent subdivisions under each area (e.g. under Academic Affairs subfolders included may be Academic Vice President, College of Arts & Sciences, College of Business, etc.).
- By major topics, such as planning, assessment, etc.
- Consider adding a cover sheet to all files. Cover sheets are not required, but they can give a uniform appearance to the documents and provide a helpful orientation to the evidence for reviewers.
Assurance Filing Instructions
User Guide Topics
All Users
Institutions
Peer Reviewers
Peer Corps Applicants

Related Resources

Questions?
Submit a Canopy Help Request